- Published on
Homelab Update - Proxmox Networking
If you have a homelab with some basics like hypervisors and managed switches, but haven't managed to bring it all together, this should be a good first step.
The Problem
Many people have a "flat" home networking, making it impossible to control, or even have visibility into, the traffic from one device to another.
The solution
All that is needed for this to work is a PC running Proxmox. A managed switch is a nice bonus that allows you to segment your physical network, but isn't necessary. Virtualizing our Firewall on OPNSense allows us to get additional use out of a single PC. With a powerful enough Proxmox host you could run all your homelab servers and OPNSense, all on one physical PC. This of course doesn't provide redundancy for the physical aspects of our network, but maybe you're like me and accept some risk in this regard. I don't have a redundant modem for my home cable connection, so lacking redundancy on the router/firewall is okay with me, for now anyway.
To give some idea on how this can be configured, I made this quick diagram:
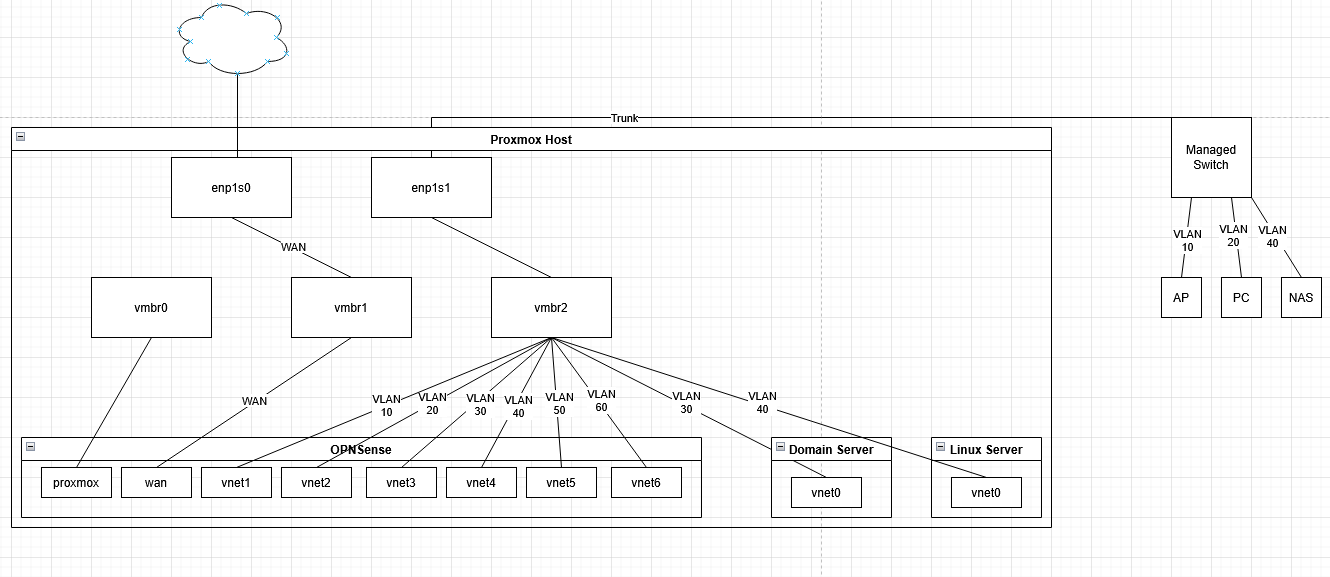
To virtualize servers on different VLANs, providing segmentation between your physical devices and virtual servers, you could ignore the trunk running to the managed switch. You could place your LAN, including your home AP, on the virtual bridge without any VLAN tags, and it would work just fine. If you have a managed switch though, this becomes a lot more useful (and FUN)!
The essential configuration steps needed to make the out of the box installs of Proxmox and OPNSense work:
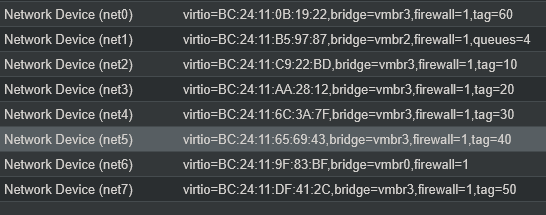
- Add NIC of VM to correct bridge and tag with appropriate VLAN
- Add NIC of OPNSense to the same bridge as the VM(s) you're connecting, and tag with the appropriate VLAN
- Assigned NIC to an interface in OPNSense
- Assign static IP address to interface in OPNSense, to become default gateway for the subnet
- Add an "Allow Any to Any" before the implicit deny for the interface in OPNSense, so traffic can pass
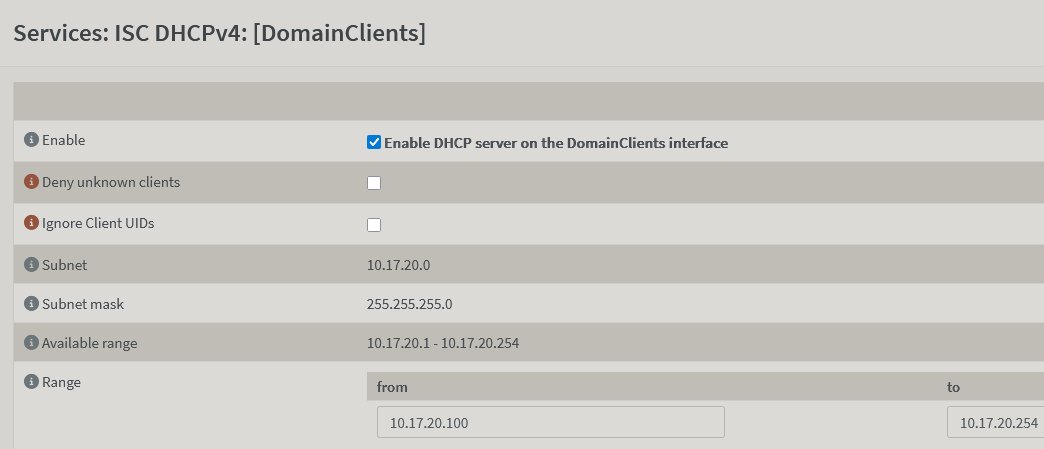
- (Optionally) Enable DHCP on interface in OPNSense (or somewhere else on VLAN, like windows server for a domain)
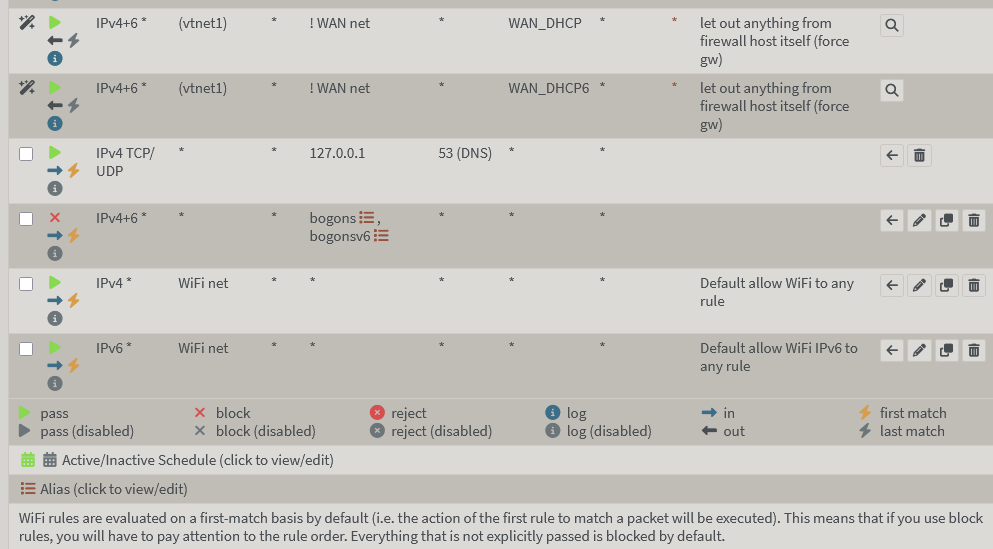
Obviously an allow any isn't ideal, but it's a start! Next step is to craft some rules to log, and see what would get blocked if enabled.
Proxmox Network Config
/etc/network/interfaces
auto lo
iface lo inet loopback
auto enxf0a731f41d40
iface enxf0a731f41d40 inet manual
auto enp1s0
iface enp1s0 inet manual
auto enxf0a731c67a68
iface enxf0a731c67a68 inet manual
auto vmbr0
iface vmbr0 inet static
address 10.17.0.2/24
gateway 10.17.0.1
bridge-ports none
bridge-stp off
bridge-fd 0
auto vmbr2
iface vmbr2 inet manual
bridge-ports enxf0a731c67a68
bridge-stp off
bridge-fd 0
#WAN
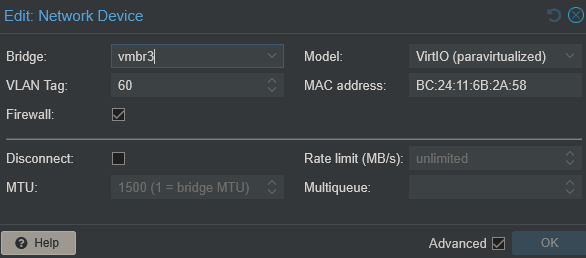
auto vmbr3
iface vmbr3 inet manual
bridge-ports enxf0a731f41d40
bridge-stp off
bridge-fd 0
bridge-vlan-aware yes
bridge-vids 2-4094
#Trunk
Combine Virtualized VLANs with Physical VLANs
If you happen to have a managed switch, you can easily setup a trunk on the switch and enable the VLANs across it. This would allow you to place a wireless AP on a specific VLAN, to segment your hardwired PCs from wireless devices. You could further segment your network if you have multiple physical devices, such as desktops vs servers, and use your virtualized OPNSense as the gateway between all the segments.
All that is needed to accomplish this is:
- enable "VLAN aware" on the virtual bridge in Proxmox that your switch's trunk connects to
- create NICs for each VLAN on the OPNSense VM, connecting them to the appropriate bridge and tagging with the appropriate VLAN
Once setup correctly, the virtual bridge will add and remove VLAN tags, sending traffic only to the correct NIC(s), just like a physical switch would. Running tcpdump on a NIC in promiscuous mode confirms the traffic from other VLANs isn't being leaked.
For an example of how useful this is, my Wi-Fi access point is on an access port of my switch, that port's VLAN is allowed on the trunk running to Proxmox. The Wi-Fi access point traffic is segmented from my desktop and servers. Currently there is communication possible between these segments, but with OPNSense and network boundaries in the middle it's now possible to limit communication. It's also possible to start building baselines and getting an idea of what normal traffic between these segments looks like.
In case you're not super familiar with Cisco IOS, below is enough of a config to get your trunk operational. Modify as needed, of course.
Switch Config
...
vlan 10
 name Wi-Fi
!
vlan 20
 name Domain-Clients
!
vlan 30
 name MGMT
!
vlan 50
 name Non-Domain-Clients
!
vlan 100
 name Unused
!
!
!
interface GigabitEthernet0/1
 switchport trunk encapsulation dot1q
 switchport trunk allowed vlan 10,20,30,50
 switchport mode trunk
 switchport nonegotiate
!
interface GigabitEthernet0/2
 switchport access vlan 10
 switchport mode access
 switchport nonegotiate
!
interface GigabitEthernet0/3
 switchport access vlan 20
 switchport mode access
 switchport nonegotiate
!
interface GigabitEthernet0/4
 switchport access vlan 20
 switchport mode access
 switchport nonegotiate
!
interface GigabitEthernet0/5
 switchport access vlan 50
 switchport mode access
 switchport nonegotiate
!
interface GigabitEthernet0/6
 switchport access vlan 50
 switchport mode access
 switchport nonegotiate
!
interface GigabitEthernet0/7
 switchport access vlan 100
 switchport mode access
 switchport nonegotiate
!
interface GigabitEthernet0/8
 switchport access vlan 100
 switchport mode access
 switchport nonegotiate
!
interface GigabitEthernet0/9
 switchport access vlan 100
 switchport mode access
 switchport nonegotiate
!
interface GigabitEthernet0/10
 switchport access vlan 100
 switchport mode access
 switchport nonegotiate
!
interface Vlan1
 no ip address
!
interface Vlan30
 ip address 10.17.30.2 255.255.255.0
ip default-gateway 10.17.30.1
...