- Published on
Capstone Resources
How I Built My Capstone:
Currently working on the Capstone for my Bachelors! Feel free to submit a request for an account, but I probably won't approve it unless you also email me.
This site was an excellent resource for the Machine Learning side of things! I ended up using TfidfVectorizer and C-Support Vector Classification (SVC) from scikit-learn , a Python ML library, to train the model. TfidVectorizer "Convert(s) a collection of raw documents to a matrix of TF-IDF features. Equivalent to CountVectorizer followed by TfidfTransformer". In other words, it can turn text into a matrix (rows and columns of numbers), which is what the ML model needs to be trained, and also do its predictions after training.
After training the model in Jupyter Notebooks, I adapted it for FastAPI, a Python-based backend framework known for its performance and ease of use. At first, I had FastAPI training the model on each restart of the dev server, but I quickly realized this was slowing progress, so I used joblib to persist the TfidfVectorizer and model to disk.
I wanted to open the application up to the web, to showcase my project and honestly just to see how difficult it would be! I needed authentication, and that's when I found this blog post detailing a simple implementation of JSON Web Tokens (JWTs) in FastAPI. I adapted it to my project to protect the compute-intensive routes, but I still wanted more functionality on the front end, so I modified it to include basic role-based access control (RBAC), providing an admin role. Now, I can allow users to "sign up" but control which user's accounts are active from a GUI rather than needing to pop a shell and dip into the SQL directly. I thought about building functionality to add and delete accounts directly on the admin panel but decided against it because I've already gone way further than needed and have other projects I'm eager to get back to after this passes eval.
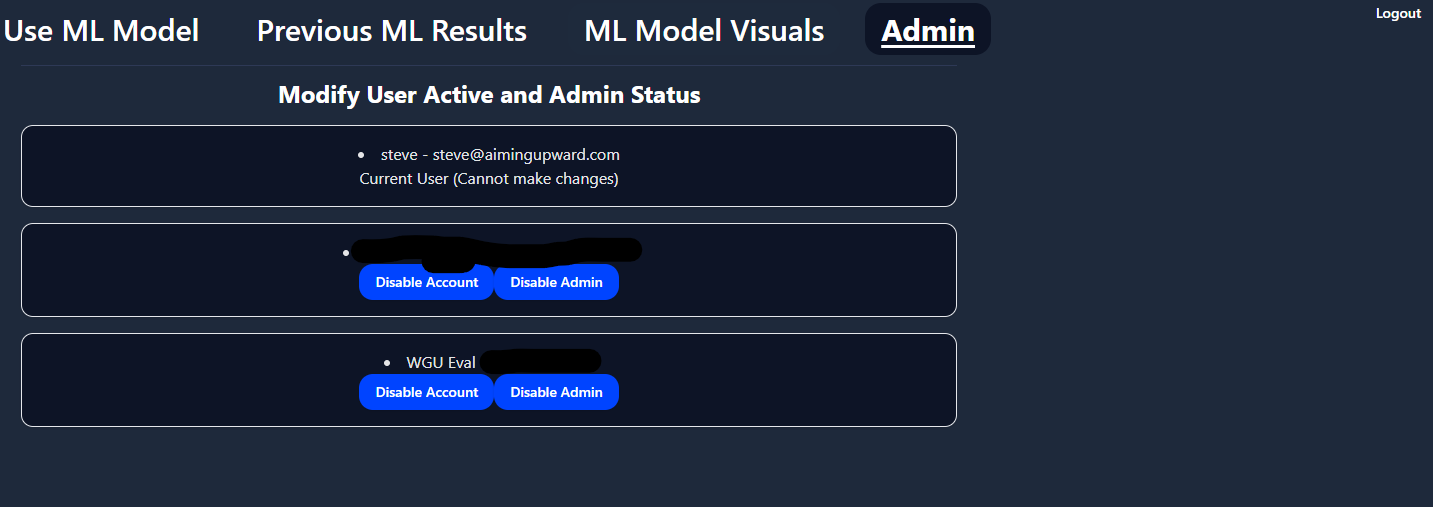
The front end was more work than first thought, but that's been an ongoing theme for this entire project! I learned a lot about React, Tanstack Query, and Tanstack Router! I'm very proud of how I integrated my currently logged-in user's data into React's context. Tanstack Router provides an API to retrieve React Context data before any page loads. This lets me adjust what is displayed (whether to show the login page or use ML model page, whether or not to show the admin panel link) based on whether the user is authenticated and what level of authorization they have.
Creating context so "user" queryKey is available throughout App:
function App() {
  const apiBaseUrl = import.meta.env.VITE_API_BASE_URL || "https://capstone.stevenrichards.link/api";
  useSuspenseQuery<User>({
    queryKey: ["user"],
    staleTime: Infinity,
    queryFn: async () => {
      const response = await fetch(`${apiBaseUrl}/user`, {
        method: "GET",
        headers: {
          "Content-Type": "application/json",
          Authorization: "Bearer " + localStorage.getItem("access_token"),
        },
      });
      const data = await response.json();
      return data.detail === "Not authenticated" ? null : data;
    },
  });

  return (
    <RouterProvider
      router={router}
      context={{
        apiBaseUrl,
        queryClient
      }}
    />
  );
}

ReactDOM.createRoot(document.getElementById("root") as HTMLElement).render(
  <React.StrictMode>
    <QueryClientProvider client={queryClient}>
      <React.Suspense fallback={<div>Loading app...</div>}>
        <Toaster />
        <App />
        <React.Suspense>
          <TanStackRouterDevtools router={router} />
        </React.Suspense>
        <ReactQueryDevtools initialIsOpen={false} />
      </React.Suspense>
    </QueryClientProvider>
  </React.StrictMode>,
);
Reading from context before rendering route:
beforeLoad: async ({ context }) => {
    const beforeLoadUser = context.queryClient.getQueryData(["user"]);
    return { beforeLoadUser };
  },
  component: () => {
    const { beforeLoadUser, queryClient } = Route.useRouteContext();
While deploying the app I realized the need for backend API calls to be secure, so had to point them to the HTTPS endpoint. Apparently browsers don't like sites using the HTTPS protocol making HTTP requests! During development HTTPS wasn't necessary, so I came up with the apiBaseUrl prefix solution for all my API calls. The .env file responsible for supplying VITE_API_BASE_URL doesn't get copied into the docker image, so the other apiBaseUrl is used when containerized. A small amount of configuration in Caddy let me add an /api prefix to my backend endpoints, but remove it off the request at the reverse proxy, meaning I didn't need to change my backend code. This blog post was extremely useful for the deployment!
https://caddy {
	tls internal

	handle_path /api* {
		reverse_proxy http://backend:8000
	}

	reverse_proxy * http://frontend:3000
}
Stay tuned for more details!